After completing 6 blocks in Inventor, we had to make the blocks in idw and with that we made it into a title Block. After that i feel more advanced with Inventor now.
Thursday, June 16, 2011
Wednesday, June 15, 2011
Title Blocks
After completing the 6 blocks we had to make a title block and with that I did 6 in total. I learned a lot and I feel more advanced with Inventor.
Title Blocks
After completing the 6 blocks we had to make a title block and with that I did 6 in total. I learned a lot and I feel more advanced with Inventor.
Title Blocks
After completing the 6 blocks we had to make a title block and with that I did 6 in total. I learned a lot and I feel more advanced with Inventor.
Friday, June 10, 2011
Sketches
In this project we had to get 6 sketches from a paper and we had to make them onh inventor. With this I learned how to use inventor better and am much moree skilled with sketching in Inventor.
Sketches
In this project we had to get 6 sketches from a paper and we had to make them onh inventor. With this I learned how to use inventor better and am much moree skilled with sketching in Inventor.
Sketches
In this project we had to get 6 sketches from a paper and we had to make them onh inventor. With this I learned how to use inventor better and am much moree skilled with sketching in Inventor.
Sketches
In this project we had to get 6 sketches from a paper and we had to make them onh inventor. With this I learned how to use inventor better and am much moree skilled with sketching in Inventor.
Sketches
In this project we had to get 6 sketches from a paper and we had to make them onh inventor. With this I learned how to use inventor better and am much moree skilled with sketching in Inventor.
Paremtic Constraints
Engineers perform similar types of plug and produce operations, specifically in the area of 3D CAD solid modeling. Numeric constraints, also referred to as parametric dimensions, may not always have a fixed number value. Some objects must be customized, like a tailored suit or dress. If you were to return to one of your elementary school classrooms, you would think that someone took normal sized furniture and uniformly scaled it down.
Tuesday, June 7, 2011
Dimension Standard Shapes
In this activity we had to get 6 shapes out of a bunch and with that I leaned how to make it on inventor with a perfect scale model.
Dimension Standard Shapes
In this activity we had to get 6 shapes out of a bunch and with that I leaned how to make it on inventor with a perfect scale model.
Dimension Standard Shapes
In this activity we had to get 6 shapes out of a bunch and with that I leaned how to make it on inventor with a perfect scale model.
Dimensioning Standard Shapes
In this activity we had to get 6 shapes out of a bunch and with that I leaned how to make it on inventor with a perfect scale model.
Friday, April 8, 2011
Threaded Rod
In this activity we had to got a Regular cylinder and made it to a Threaded Rod. We had to change some things in Inventor and than the Threaded Rod was complete and perfect.
Monday, March 21, 2011
Base Block
In this project we got a block and than had a couple of shapes and had to put the shapes in the Block to make the Block complete. After that I learned alot of how to connect shapes together and I am better at it now.
Friday, March 11, 2011
Water Bottle
Decal is a function that allows the user to place an image onto a model surface. This function requires a feature and sketch, such as the water bottle and the logo graphic pictured above. Graphics must be either JPG or BMP formats. Use the decal function to wrap the image around the surface of the water bottle.
Emboss
Emboss is a function that allows the user to raise a design from a surface, or carve a design into a surface. This function requires a feature and a profile, such as the wrist band and text. Use the emboss function to project the text down onto the surface of the wrist band, and extrude the letters a distance of .02 inch.
Left Half
Use the mirror function to add a duplicate mirror image of the existing geometry on the other side of the right face of the object.
Spring
Use the coil function to turn the existing circle into a spring form by coiling it around the Y axis of the Cartesian coordinate grid. The Y axis must be selected from the origin folder in the browser bar. The spring will have a height of 6 inches and the circle will revolve around the Y axis a total of five times.
Paper Clip
Use the sweep function to extrude the circle along the existing path to create the form of a paper clip.
Rib Support
A line profile has been created on a work plane that exists midway through the object. Use the rib function to turn this line profile into a .125 inch support web between the two perpendicular surfaces.
Lunch Tray
Rotate the object so that its underside is visible, as shown in Step #1. Use the shell function to pocket out the material on the bottom side of the object, leaving a wall thickness of .3125 inch, as shown in Step #2. Save the file as a different name.
Pattern Along a Path
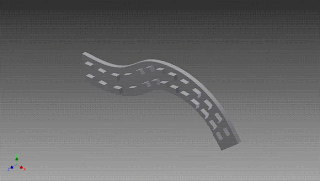
Use the rectangular pattern function to copy the existing rectangular extrusions 13 times along the curved path of the base feature.
Rectangular Pattern
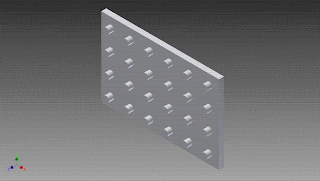
Use the rectangular pattern to copy the existing cylindrical extrusion six times in the horizontal direction and four times in the vertical direction.
Cirrcular Pattern
Circular Pattern, and use the circular pattern function to copy the existing hole on the flange plate a total of 10 times (the first hole must be represented in the count) around the existing work axis.
Drilled Holes
The existing feature is a blind hole, and has been created for you. The following page shows the different function windows that are associated with a counterbore, countersink, threaded hole, and clearance hole. All hole centers in a sketch will be auto-selected by the computer when the hole command is initiated. You will have to hold down the shift key to deselect the hole centers that you do not want. Work your way around the block in a clockwise direction initiating the hole function, selecting the appropriate hole center, and identifying the type of hole feature that is needed. The counterbore will have a major diameter of .75 inch that is recessed .25 inch. From there, its through hole will have a diameter of .375 inch. The countersink has a major diameter of .75 inch, with a taper of 83°. Its through hole has a diameter of .375 inch. The threaded through hole has a nominal diameter of .25 inch, and a 1/4-20 thread applied to its interior wall. The clearance hole goes through the disc, and has a diameter of .531 inch. Note: a shared sketch will not disappear after the first feature is created. 

Bushing
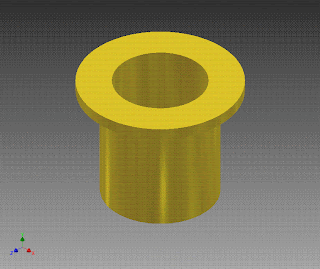
Revolve is a function that allows the user to extrude a closed profile around a fixed axis up to 360°. The axis can be part of the profile, an existing edge on a part, or one of the axes of the Cartesian coordinate grid. Grid axes may be selected from the Origin folder located in the Browser bar. Open the file called Bushing. Use the revolve function to revolve the sketch around the existing axis a full 360°.
Tapered Extrusions

Extruded objects can be givenpositive or negative taper angle. A common example of
a tapered extrusion is the design of an ice cube. The sides of the ice cube are tapered with
a draft angle to allow the cube to be easily removed from the ice cube tray. Open the file called Extrude-Taper, and extrude the square a distance of 1 inch with a taper angle of -10°.
Intersect Extrusion
Mid-Plane Extrusions
In this assignment we got a file called activity 2.1.5 CAD and we had to solve the problem which was,and perform a 1 inch extrusion on the sketch. i finished this on in no time.
Tuesday, March 1, 2011
The Blue Prints
In this part of the project we had finished everything and now our teacher made us make a blue print of the project. In the blue print we put our name and school named and it looked well to.
Animation of Cube
In this part of the project i had finished the Puzzle Cube on Inventor. Now the problem was to animate the cube and make it into a clip. The clip is 10 seconds long and it looks great on Inventor when you play the clip.
Puzzle Cube
In this project we had to take the 3-D cube that we made and make it on Inventor. At first it was hard but with help with teahcer and classmates I made the cube in the time of one class.
Monday, February 7, 2011
Evolution of Trains
This project was a about picking a object which you could check out their history. I picked the train and I learned a lot of it. I learned that there were many trains and that the fastest train goes 200 miles per hour. That's amazing and i learned a lot. This picture shows the power point a a presentation board.
Designs and Sketching
On this project I got a sheet of designs and had to draw them again to improve my skills with drawings.I wasn't really good at drawing but after I saw how I sketched these figures I surprised myself and was amazed of how I could draw the figures very well.These were only some of the figures out of the ten I sketched.
Engineer Notebook and Cd of History of Measurement
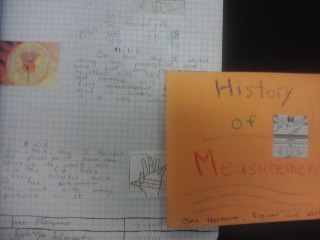
In this part of the project I just used my Engineer Notebook to put what I did every day and than I did a Cd of the History of Measurement. the Cd was mostly just a Cd with information of what you did on the project. The project teached me a lot of measurement and made me open my eyes of our past a present of tools.
History of Measurment Power Point
In this project we had to create a power point of the history of measurement. This was mostly about who created it and who used it at what times. This power point was very shocking because I didn't know half the things that happened and now I know I am happy with this because I have more knowledge of the history of measurement.
Cube, Package, and Combinations
This project was about finding as many possible cube combination's with the numbers 3,4,5,6. After that we should have had many combination's done and with that you would create a cube which was 3 by and could only use 5 pieces of the combination's you used. After that you were to create a packaging box where you would ship the cube in. It was a complete success with all the pieces together.
Inventor Beverage Cup
In this part of the project we had to use inventor to create a version of the cup. We already created the cup by hand and now it was time to use the computer to create it. Once again me and Angel worked together and created the cup successfully. It looked great at the end and was an amazing innovated cup.
Beverage Cup
The purpose of this project was to think of a way to innovate a cup and see how you can make the cup better. This project was worked with a partner and my partner was Angel. we made the cup to pop up a straw with the push of a button and also it was a warmer or cooler for your coffee or soda and water.
Welcome!
Hi! My name is Juan Manzano and I will be using this blog as a portfolio for my Engineer and Design class. I will be posting my projects and examples along with a brief description of what I did. Please check back to see my work!
Subscribe to:
Comments (Atom)


